Autumn Prep Home Maintenance Tips

#homemaintenancetips

It’s almost time. Sigh. Summer is drawing to a close, like it or not.

Before the leaves fall and the wind turns chilly, it’s a good idea to do some seasonal maintenance on your home. Here are some things to add to your fall “honey-do” list.

Have your furnace inspected. It’s smart to have your heating system serviced before you actually need to use it. Experts say that as much as 75 percent of the calls they receive about homeowners without heat are a result of not having the furnace serviced and cleaned. It will also keep your heating costs down and help keep the air in your home healthy.

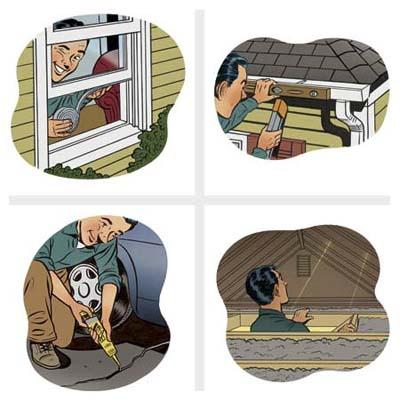
Apply a fresh coat of paint. Interior painting requires good ventilation, so the best time to tackle a paint spruce-up is the time of year when you can open up your windows.

Inspect your roof. You’ll want to check for shingles that are cracked, buckling, or missing. Check for caulking that needs to be replaced, or moss or lichen, which could indicate deterioration underneath. If you don’t trust your own assessment, work with a certified inspector.

Check for mold. The humidity of summer can cause mold to flourish. Check locations such as around leaky pipes, basements, or areas that don’t get good ventilation. You will want to remove the mold as soon as possible. It’s wise to have this done by a professional.

Replace weatherstripping on doors. There could be gaps that you can’t see and that can jack up your energy costs. It’s a simple fix that can be done with items found at your local hardware store.

Check the airflow. Focus on areas like vents, the hood over your stove, dryer vents, baseboard heaters and room fans. Not only is a buildup of dust a fire hazard, but you also want to keep the air flowing and the allergens at bay.

Get control of gutters and downspouts. Clogs in gutters and downspouts can cause the roof to leak, which can lead to a host of other problems. It’s a slippery slope from clogged gutters to water damage in your home!

Look over your siding. You’ll want to look for any areas on vinyl siding that are buckled or warped. If you have wood siding, look for curling, splitting or cracking. Should you find an issue, you’ll definitely want it taken care of before the weather gets cold!

Inspect your insulation. The most important area to check is your attic. You should have the highest concentration of insulation here. See if there are any gaps that need to be filled. You don’t need to check the insulationin your walls unless you notice heating issues.

Make sure your detectors are working. Ensure both smoke and carbon monoxide detectors have fresh batteries. It’s smart to test them, also. Both are especially important once your furnace is in use.

Each season brings its own challenges and wear-and-tear on your home. With summer ending and autumn on the way, you can go into the new season secure that your home is in tip-top shape!


Button Up Your House For Fall

We all know the drill: You wake up on a Saturday with every intention of doing some pre-winter maintenance but ditch your best-laid plans as soon as you feel the late-summer sun on your shoulders. Take a tip from the experts and avoid putting off till next Saturday (or next year) what you can do in a snap today—whether it’s replacing old weather-stripping or adjusting the pitch of the gutters. You can always put your feet up late, when it’s time to rake the leaves.

1. Weatherproof Windows and Doors

Seal gaps larger than ⅛ inch around windows and doors to cut your winter heating bill by up to 15 percent. On windows, press adhesive-backed closed-cell foam onto the bottom of the sash. Secure a loose sash by applying a strip of plastic V-channel weather­stripping in the groove the sash slides in, securing it with finish nails. Use foam strips on the sides and tops of doors, and install a door sweep on the bottom.

2. Check Your Gutters

When gutters aren’t pitched at the right angle, they overflow—and can threaten your once dry . Properly pitched gutters slope between 1/16 inch and ⅛ inch per foot, directing water to the leader and out the downspout. Check the pitch by holding a level even with the gutter; on longer runs, pour in water from a hose and check the flow’s direction. Get instructions for keeping your gutters in good working order.

3. Find and Fix Cracked Concrete

Cracks in your driveway, walkway, or steps are a big-time trip hazard, and they’ll only get worse if water seeps in and freezes. Luckily, if you can caulk, you can fix concrete—just make sure it’s clean and dry to start. For cracks less than a half-inch wide, squeeze a bead of acrylic latex concrete repair compound deep into the crack, smoothing excess with a putty knife. For larger cracks, trowel on a vinyl concrete patching compound, and let it cure one day before walking on it, three days before driving over it.

4. Clean Cooling Devices

If you have ceiling fans, change their rotation to clockwise to push warm air down (usually accomplished by flicking a switch on the base), and while you’re at it, wipe down the blades with a microfiber cloth that traps dust. At month’s end or when the temps drop, remove window AC units. Vacuum the coils and filters, and store them in a cool, dry place, preferably covered to keep out dust and bugs.

5. Check for Holes in The Attic

During the brightest part of the day or a steady rain, look for streams of light or water entering the attic through the roof or sheathing, which can lead to more serious damage (and critter invasions) if left unfixed. (Another sign of holes is black staining on insulation.) From inside, fill sheathing gaps with closed-cell polyurethane foam. Fix small roof leaks by caulking with tripolymer elastomeric sealant, which is compatible with asphalt shingles and resists UV rays. But don’t caulk large leaks, which tend to develop around chimneys or vent stacks. For now, place a bucket underneath to catch drips and stuff an old towel in the crevices to absorb moisture. Then do a more serious repair before the first winter storm hits.

6. Check Your Insulation

How do you know if your attic is properly protected? It’s simple: If you can see the tops of the joists, you’ve got a problem. If the existing insulation is roughly even with the tops of the joists, add a new layer of unfaced batt insulation perpendicular to the old one, pushing the pieces together so they fit snugly side by side. On the other hand, if the existing layers are more than an inch above (or below) the joists, blown-in cellulose or fiberglass does a better job of filling the crevices. To find out how much you need, depending on where you live, type your ZIP code into the ZIP-Code Insulation Program at the Oak Ridge National Laboratory. And give yourself a pat on the back for keeping up with fall upkeep.