Fun With Xeriscaping

Creative Xeriscaping: Save Water With Style

Westlake Project: Build a Moat!

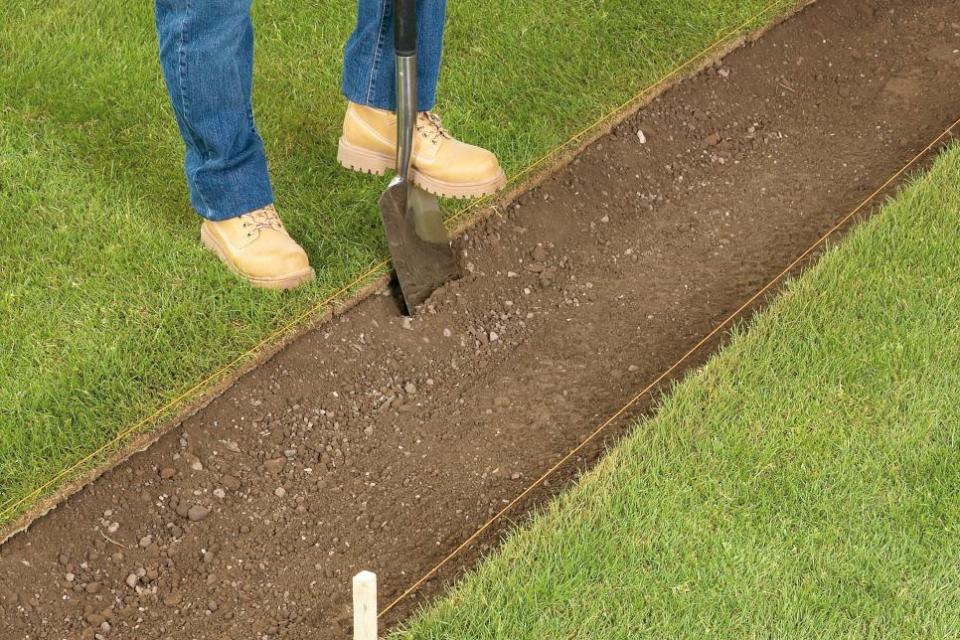
Mark Biechler of Pearson Landscape in Austin, Texas created a solution for a homeowner in Westlake, Texas whose home tended to flood during heavy rainfall. To solve the problem, a moat was built around the house (designed by Gregory Thomas of CG&S Design Build). Let it rain, let it pour. This house can now easily handle water as deep as 8 inches or more in its gravel covered moat that redistributes the excess. To appreciate the work involved in this installation, refer to these steps to make your own!

Westlake Project: Envy of the Neighborhood

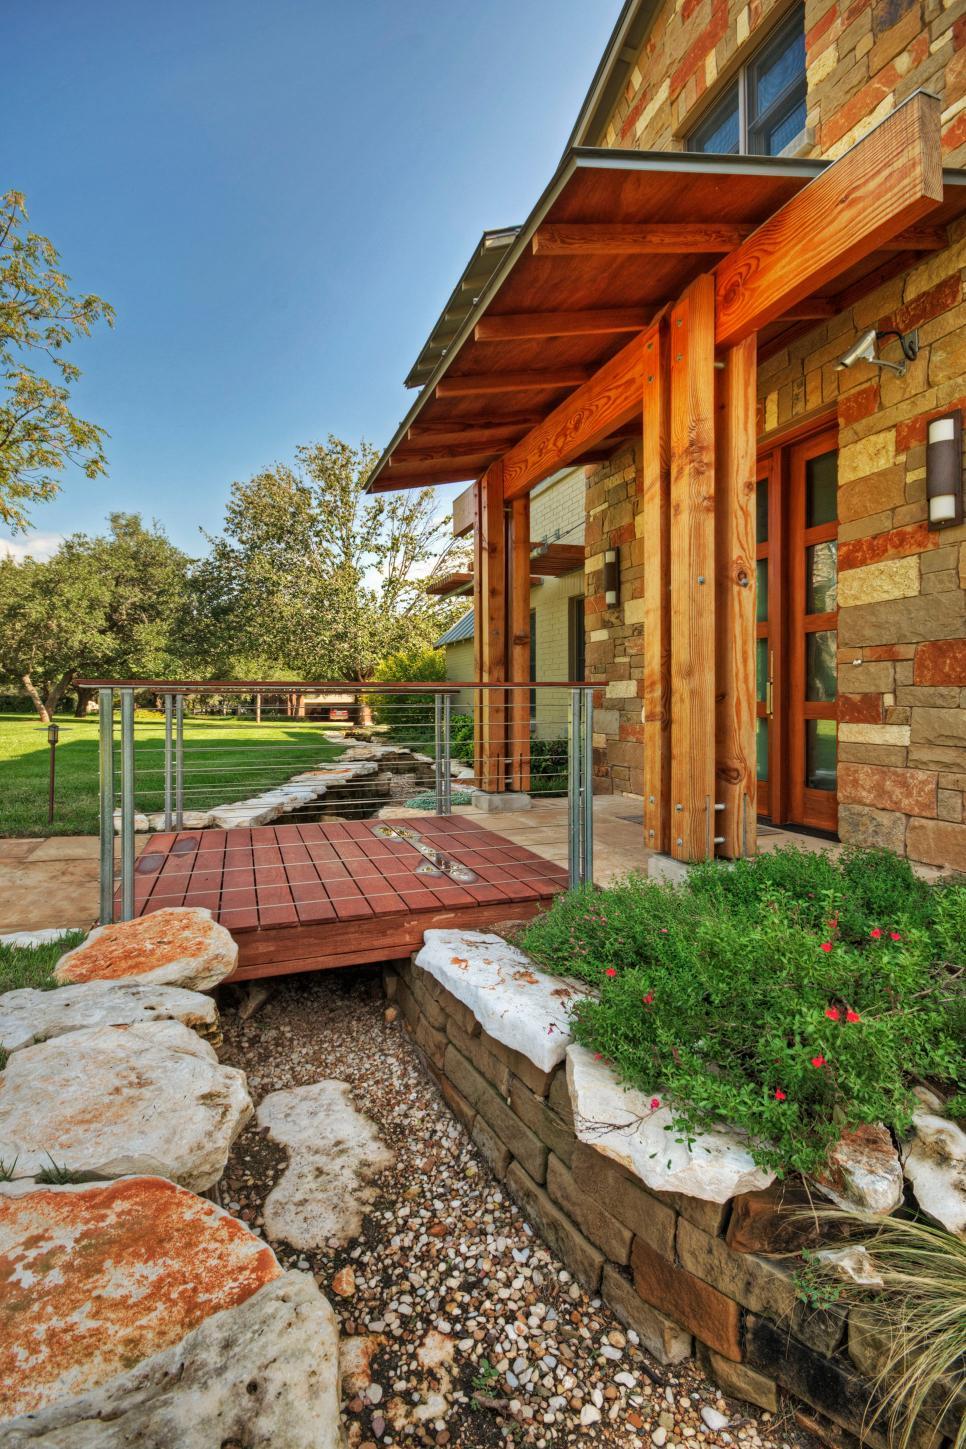
The full effect of the renovated yard and entrance is visible in this view from the far end of the front yard. You can see how the natural landscaping adds color and texture to the yard while protecting it from street flooding.

Westlake Project: More Out Back

Just as aesthetically pleasing as the front yard makeover is the newly reconstructed back yard which presents an organic, natural landscape designed for water conservation.

Arroyo Project: The Dry Creek Design

The second project by Mark Biechler of Pearson Landscape in Austin, Texas involved creating an arroyo (dry creek bed) between two properties that would effectively handle storm water runoff and also serve as photogenic xeriscaping.

Arroyo Project: Ready for Action

This street view of the completed dry creek shows how on the far left, any excess water will be channeled over the gravel and large rock slabs into the gutter.

Arroyo Project: Double Duty Beauty

Many native plantings along the arroyo help conserve water while adding color and decoration such as Yucca rostrata (in the foreground), Mexican feathergrass to the far right, and in the background, ‘Mystic Spires Blue’ sage, Knockout roses and salvia. To appreciate the work involved in this installation, refer to these steps to make your own!


How To Lay A Brick Pathway

Prepare to Lay a Paver Path

Lay out pegs and string lines along the edges of the path. Dig out the path area to a depth of paver height plus a 2-inch (5-cm) sand bed.

Create a Form for the Path

Put treated wood edging into the excavated area. Drive in wooden pegs on the external side of the board to keep it in place.

Lay the Sand Base for the Pavers

Compact the soil with a rammer. Pour sharp sand into the excavated area and use a wooden furring strip notched out at each end to level off the sand surface to the depth required for the pavers.

Prepare to Cut Paver Blocks

Position the paver between the jaws of the block splitter. Align the point you wish to cut.

Cut the Pavers

Lower the handle of the splitter to break the paver in two.

Laying a Paver Path

Lay blocks in your chosen design. Butt each end up against the next.


This #FoldingTechnique Will Change The Way You Pack Forever

With airline baggage fees constantly creeping up, people are doing anything to pack as much into their carry-on bag as possible. Interestingly, Homeland Security is now blaming the long security lines on this major increase in carry-on luggage.

Personally, I’m not the best at keeping things nice and straight when packing.  I typically just stuff as much as possible into the suitcase which leaves me with a wrinkly mess when I get to my destination.

If you want to try a very different approach to packing your suitcase in the most efficient way possible, look no further than this “bundle packing” technique. With this method, all of your clothes are wrapped together instead of folded, which makes them less prone to wrinkling. Check out the technique in action below:

One part of me is pretty amazed by this approach, and it definitely seems like a great way to pack as much stuff as possible. But on the other hand, it doesn’t appear to be very practical. If I need a pair of socks or undies, I have to unwrap everything.

What do you think?…